Devrek White Baklava: Traditional Turkish Walnut Baklava with Delicate Pale Layers
This traditional recipe by Derya Soylu provides step-by-step instructions for baking Devrek's famous 55-layer white baklava at home. Filled with walnuts and clarified butter, this unique dessert requires gentle, low-temperature baking to maintain its authentic pale color
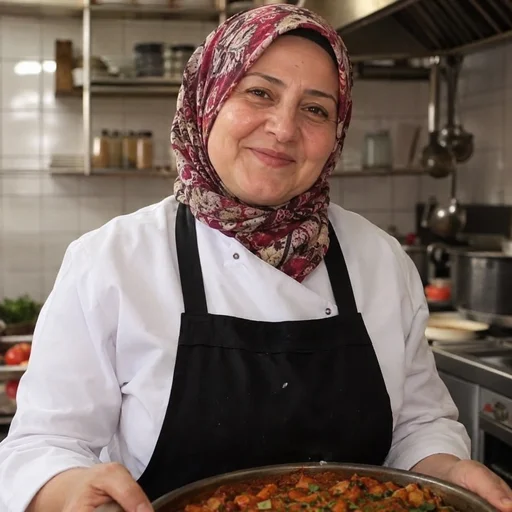 derya soyluChef & Food Writer
October 22, 2026
Making white baklava takes patience: while kneading the dough, rolling the pastry thinly and waiting for it to bake without losing its pale colour. Its beauty lies in cooking those delicate layers through while keeping the surface light.
I like to distribute the walnuts evenly and take my time with the pastry. When you lift a slice onto a plate, every mouthful should contain some walnut, rather than a filling gathered only in the centre.
Associated with Devrek, a district of Zonguldak in Türkiye, this baklava deserves an unhurried afternoon. Clear your work surface, prepare your rolling pin and give yourself plenty of time.
Ingredients
For the dough
- 2.5 kg flour suitable for baklava
- 3 eggs
- Half a Turkish tea glass of neutral cooking oil
- Half a Turkish tea glass of vinegar
- 20 g salt
- Water, added gradually until a soft dough forms
Use the same tea glass for the oil and vinegar. An exact millilitre capacity is not specified for these traditional quantities.
For rolling
- Wheat starch
- A little flour for dusting the work surface
For the filling and buttering
- 300 g walnut kernels
- 300 g clarified butter
For the syrup
- 2 kg granulated sugar
- 2 litres water
- Juice of half a lemon
- A pinch of salt
These quantities make a large batch. Make sure your mixing bowl, trays and pastry-rolling area are large enough before starting.
How to Make Devrek White Baklava
1. Knead the dough
Sift the flour into a large bowl. Make a well in the centre and add the eggs, oil, vinegar and salt.
Mix the ingredients in the centre with your hand, gradually drawing in flour from the edges. Add water in small amounts to bring the dough together.
Do not pour in a large quantity at once. Flour absorbs water differently, so knead and check the consistency after each addition.
Once the dough comes together, knead for approximately 15 minutes. It should become soft, smooth and suitable for rolling. A stiff dough will be difficult to stretch thinly, while an overly wet dough will stick to the work surface.
2. Divide and rest
Divide the dough into manageable portions. Roll each into a ball and place on a lightly floured surface.
Cover with a clean cloth and leave to rest for approximately 30 minutes.
Keep the dough covered so the surface does not dry out. A dry skin makes thin rolling more difficult.
3. Prepare the walnuts
Crush the walnuts with a pestle and mortar or chop them into small pieces with a knife. If using a food processor, work in short pulses.
Aim for small pieces rather than walnut flour. Taste them before using; stale or bitter walnuts will affect the whole tray.
4. Roll the pastry thinly
Lightly flour the work surface. Take one rested dough portion and flatten it into a small round.
Dust with wheat starch and gradually roll it out using a thin rolling pin. Turn the pastry as you work, thinning the edges as well as the centre.
Aim for a sheet thin enough for light to pass through. Avoid leaving thick deposits of starch on its surface.
Keep the remaining dough portions covered.
5. Let the sheets dry slightly
Lay the rolled sheets separately on clean, dry surfaces and allow them to lose some moisture.
Do not stack them at this stage, as they may stick together. Support the delicate sheets with both hands when lifting them.
Reserve the sheets intended for the base and the final top layers so you can use them without drying.
6. Prepare the tray
Gently melt the clarified butter without letting it burn. Use a little to grease the base and sides of the tray.
Place an undried sheet on the bottom, then begin adding the lightly dried pastry layers.
Trim thick edges that overhang the tray. Avoid piling the trimmings in one place, which would create an uneven patch of dough.
7. Distribute the walnuts between the layers
Build the baklava to 55 layers. Divide the walnuts into four portions and sprinkle them after layers 10, 20, 30 and 40.
Spread each portion evenly across the tray, paying attention to the edges so the outer slices receive filling too.
Complete the remaining layers without adding more walnuts. Use undried pastry for the final two sheets and gently smooth the surface.
Do not press the layers down firmly.
8. Cut and butter
Using a sharp knife, make parallel cuts followed by diagonal cuts to form diamond-shaped portions. Cut all the way to the bottom.
Pour the remaining hot—but unburnt—clarified butter evenly over the pastry, allowing it to reach the cuts between the slices.
Baking
White baklava is baked slowly so its surface stays pale. One stone-oven method uses approximately 160°C for 3–3½ hours. This setting cannot be transferred directly to a domestic electric oven with the same expected result, because the ovens deliver heat differently.
I cannot give a verified domestic-oven temperature for this particular recipe. With a batch this large, arrange the baking stage beforehand with a bakery experienced in making white baklava.
A pale surface alone does not mean it is ready. Moisture must leave the inner layers, and the pastry must cook all the way through.
Prepare the Syrup
Place the sugar, water and pinch of salt in a saucepan. Stir until the sugar dissolves, then bring to the boil.
Reduce the heat and simmer gently for approximately 30 minutes. Add the lemon juice, cook for a few more minutes and remove from the heat.
Do not reduce the syrup until excessively thick. It needs to remain fluid enough to travel between the pastry layers.
Add the Syrup and Rest
Let the baked baklava cool until warm. Ladle the hot syrup evenly over the tray.
Move across the surface and between the slices rather than pouring everything into one spot. Leave for 2–3 hours to absorb the syrup.
Avoid lifting or moving the pieces during this time. Resting is part of the preparation.
Small Details That Matter
- Roll the sheets evenly. Thick edges cook differently from thin centres.
- Do not burn the clarified butter. Its flavour would overpower the pastry and walnuts.
- Spread walnuts right across the tray. Aim for a balanced filling in every slice.
- Allow enough time after adding the syrup. The layers need time to absorb it.
- Do not confuse pale colour with a lighter dessert. This is still a rich baklava made with butter, walnuts and syrup.
How to Serve
Once the syrup has been absorbed, slide a thin spatula beneath each slice, supporting its lower layers as you lift.
I prefer a simple presentation. The pale pastry and walnuts already give the dessert its character.
Serve with plain tea and take your time with the first bite, enjoying the thin layers, walnuts and clarified butter together.
Enjoy!
Derya Soylu
💬 Comments (0)
Traveler comments are shown in their original language.
No comments yet. Be the first to share your experience.
💬 Want to join the discussion?
Log in or create an account to leave a comment.